Wilmslow Astro
Astronomy from a Cheshire suburb
My Software & Stuff
I'll place any software I develop on this page. Any software is supplied 'as-is' and no formal support is provided. Of course you use this software at your risk and I cannot be held responsible for any subsequent damages caused.
That over with, I hope you find these utilities useful.
Kelling Heath Pitch Map
A Google Earth overlay that shows where all the pitches are located at Kelling Heath. Useful for the star parties held there.
[Download Google Earth Overlay]
Stellarium Simple Horizon
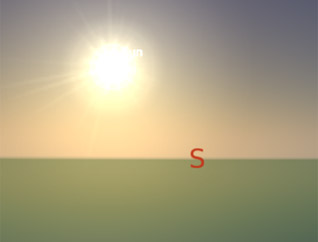
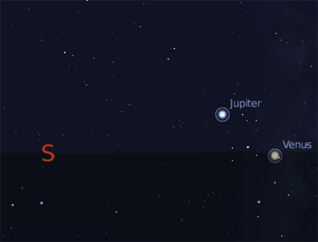
This is a simple semi-transparent horizon for Stellarium. It allows you to see objects below the horizon and clearly see rise/set events.


Stellarium Hevelius Constellation Art

Still very much a work in progress, I have used the Hubble Source high resolution scans where they are available. For the other constellations I have used images from Wikipedia and cleaned them up by hand.
As Hubble Source adds more high resolution scans I will include them in this sky culter, also as I find and process more low resolution images I will provide updates.
No installer - just unzip the contents of the file below into your Stellarium\skycultures folder.
Last update 14 Nov 2014 - v1.1 - Stellarium 0.13 update.
[Download Hevelius Sky Culture]
Iris Looper
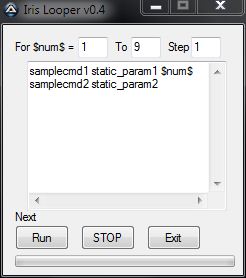
This simple little script allows you to run a FOR NEXT loop against the Iris Command window with access to an incremental variable. It is pretty crude with no input checking, so make sure you type your inputs accurately.

TheSky PE Comet Editor
Updated: 4 Nov 2007, ver 1.1 due to change in source URL.
This little VB utility allows you to create new Comet files for TheSky Pocket Edition without requiring the desktop version of TheSky. See notes below about how to use it.
Note: If you have problems with the executable, there is a full installer for the editor that will also register the required VB6 controls.
[download TheSky PE Comet Editor only]
[download the Full Installer]
Windows Sidebar Gadgets
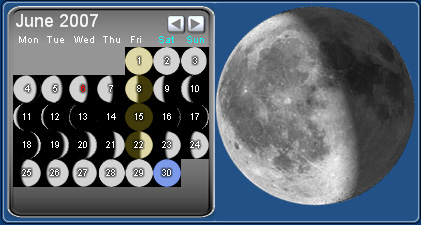
A Lunar phase widget, displays a realistic Moon on the desktop.
Moon Phase II (v1.6.0), which you can find here.

Earth Phase (v1.1.4), displays the Earth with a 'realtime' cloud layer and shadow. You can download it from here
Photoshop LRGB actions
Some Photoshop actions that simplify the creation of multilayer LRGB images. They also have layers for adding OIII and SII filter colours.
[download Photoshop LRGB actions]
VBScripts
A collection of small VBScripts to perform various miscellaneous functions.
Launch SkyMap Pro
A little utility for launching SkyMap Pro and setting the initial map to a desired time. Tested with versions 10 & 11, see notes below
Change SkyMap Pro DST setting
A script to change the SkyMap Pro Daylight saving flag according
to the current system settings. Tested with Windows XP and SMP
versions 10 & 11.
Possible usage: Put the script in your start-up folder.
Fundamental Bearing Frequency Calculator
An Excel spreadsheet to calculate the fundamental frequencies generated by a ball/roller bearing. The spreadsheet is pre-populated with typical dimensions for a Losmandy G11 worm bearing and demonstrates the origin of the dreaded "76 second error".
Application Notes
TheSky PE Comet Editor
This is a really simple utility, it can either open a file in one of three ways (the text files are in SkyMap Pro format - 'cause that's what I use!).
- Firstly a comet TLE text file on your local system. Click "Open Soft01Cmt".
- It can download one from the web, it is currently hard coded to
http://cfa-www.harvard.edu/cfa/ps/Ephemerides/Comets/Soft01Cmt.txt Click "GET Soft01Cmt from web". - Or it will open a file in TheSky PEs own internal format. Click "Open SkyPE File".
The comets contained in the file will then be listed in the utility. Select the comets that you want to be configured for TheSky PE by checking the tick box next to them.
Finally click "Write SkyPE File" to create a file in TheSky PE format. Then use ActiveSync to copy this file to the SkyPE folder on your Pocket PC.
Photoshop LRGB Actions
Copy the action file to your Photoshop actions folder. On my system this is located in...
C:\Program Files\Adobe\Adobe Photoshop CS2\Presets\Photoshop Actions
Paste each of you colour images as a new layer into your composite image.
Highlight each layer in turn, and run the corresponding action. The layer will be renamed, colourized, and two correction layers added (Curves and Levels).
Normally you will just use the R G B or L R G B actions, but I've also included a other layers for narrow band images.
Launch SkyMap Pro
Extract the program (LaunchSkyMapPro_V2.exe) from the zip file and place it in your SkyMap Pro application folder.
Create a shortcut to the LaunchSkyMapPro_v2.exe on your desktop or start menu etc. (There is an example shortcut for SMPro v11 in the zip file).
Option 1. Have SkyMap Pro start with the initial map set to a fixed time of the current day.
In the shortcut properties add the parameters "/t hh:mm" where hh:mm is the desired map time. The 'Target' should then look something like this:
"C:\Program Files\SkyMap Pro 11\LaunchSkyMapPro_v2.exe" /t 21:30
Option 2. Have SkyMap Pro start with the initial map set to the onset of darkness for the current day.
In the shortcut properties add the parameters "/d hh:mm" where hh:mm is the default map time to use if there is no darkness on the current day. The 'Target' should look something like this:
"C:\Program Files\SkyMap Pro 11\LaunchSkyMapPro_v2.exe" /d 22:00
The utility will launch SkyMap Pro from the current folder (or use the currently running version if there is one) and set the map time. It will take SkyMap Pro out of real time mode if required.
Please note that the /d option will only work on SkyMap Pro versions 10 & 11. The /t option works on versions 10 & 11, but may work on earlier versions - it hasn't been tested though.
Useful links
TheSky Pocket Edition
The cut down version of TheSky for Pocket PC's.
SkyMap Pro
My favourite planetarium program.
Vista Sidebar Gadgets
The Gallery is still in Beta, but you can find my gadgets here.
Yahoo! Widgets
Check out the gallery for lots of widgets. Download the engine to
run them.
Stellarium
Great realistic sky rendering - and it's free!